I started 3D modeling before any 3D sculpting software like Zbrush ever exist, creating models the old way: using loft, blueprints or splines… These process are very time consuming but you’re never lost as your design is based on visual references. I wanted to step away from this mechanical and technical way to model meshes.
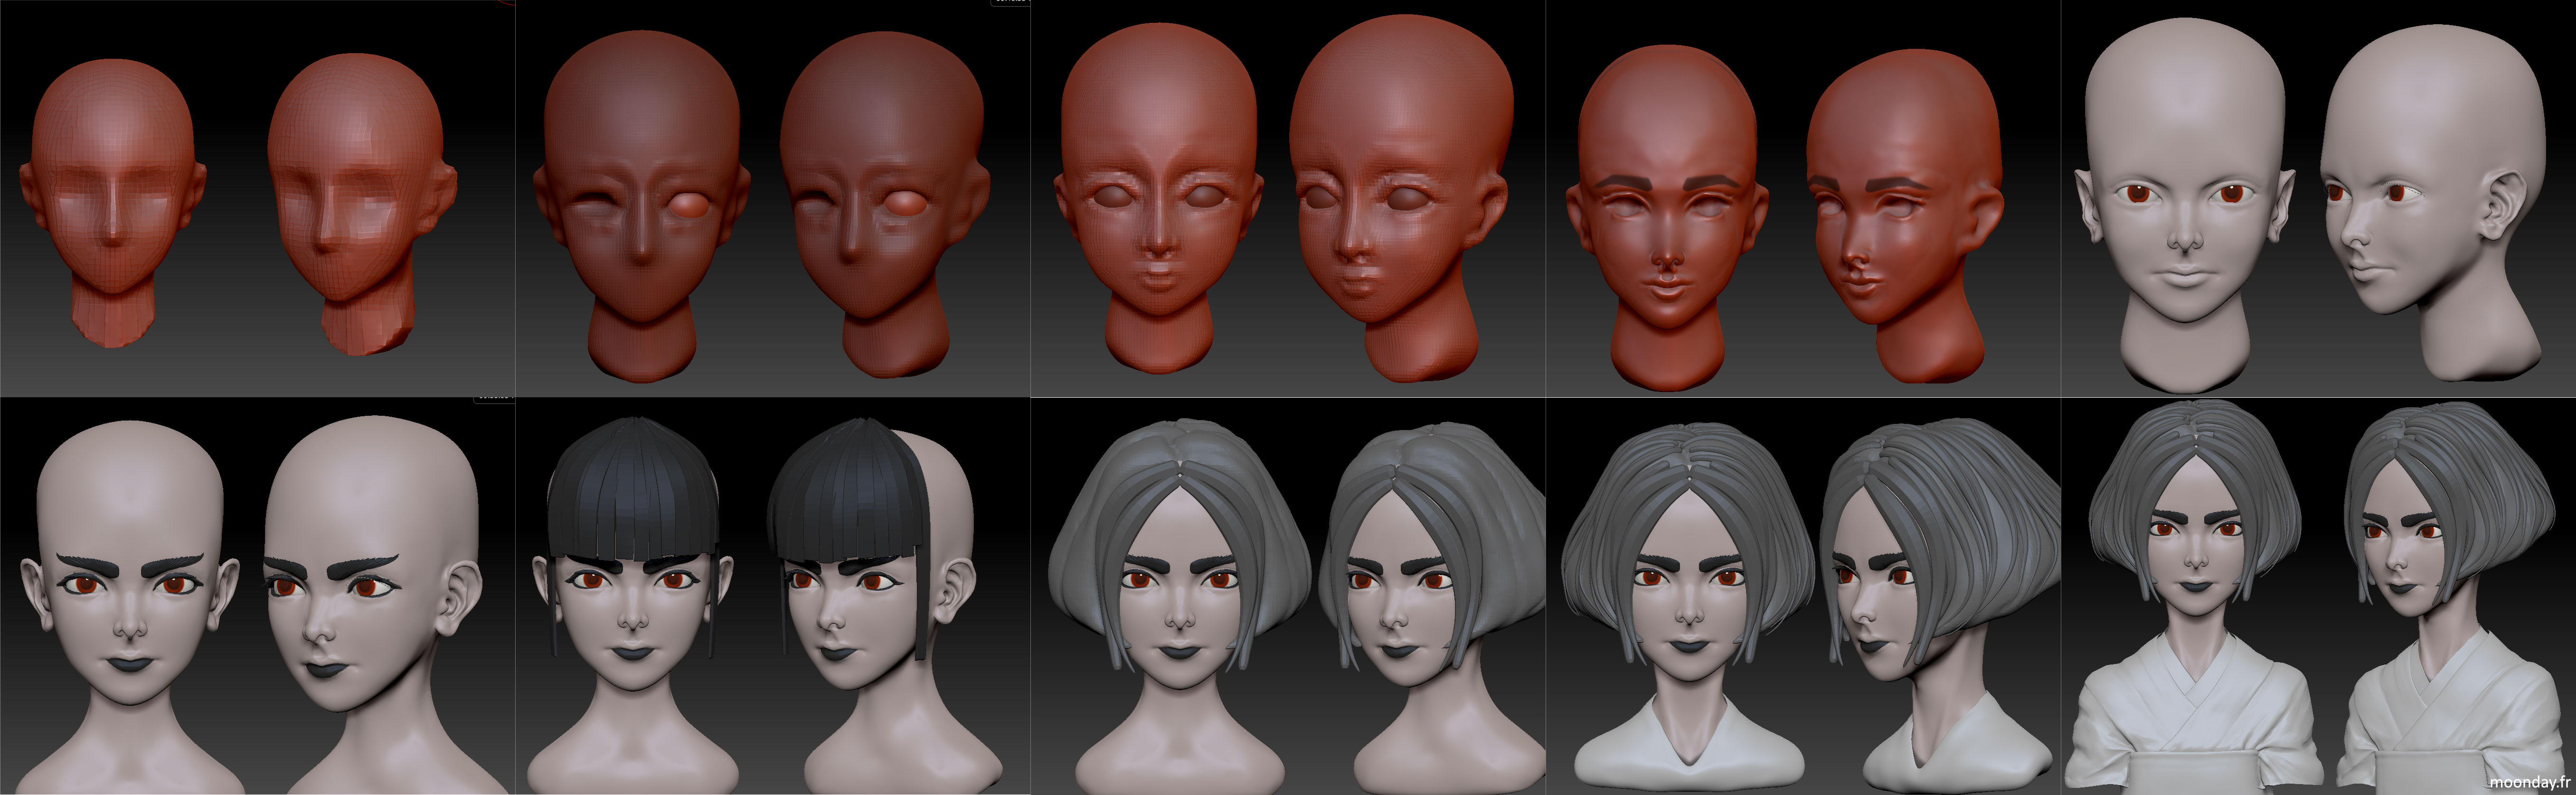
I’ve always been amazed by what some 3D artists can create from scratch in Zbrush or Modo therefore I decided to jump out of my comfort zone and said goodbye to my fears by working one month only modelling heads, starting from a simple dynamesh sphere in Zbrush. Each day I’d start a new design. In the first days I sculpted with some design I had in mind then I started to use visual references. On the first day, as hours passed, once the “potato stage” was over, I discovered the real joy of 3D sculpt and also that all my models were not doomed to look like some old Tibetan monks.

Do you remember Folken from Escaflowne?
Tsuki was part of this exercise but I wanted to go further with this model. It took roughly 8 hours to get the design in Zbrush then I moved in 3ds Max to edit the missing elements: hair, environment and props.
A good resume of the day passed on the model
Texturing
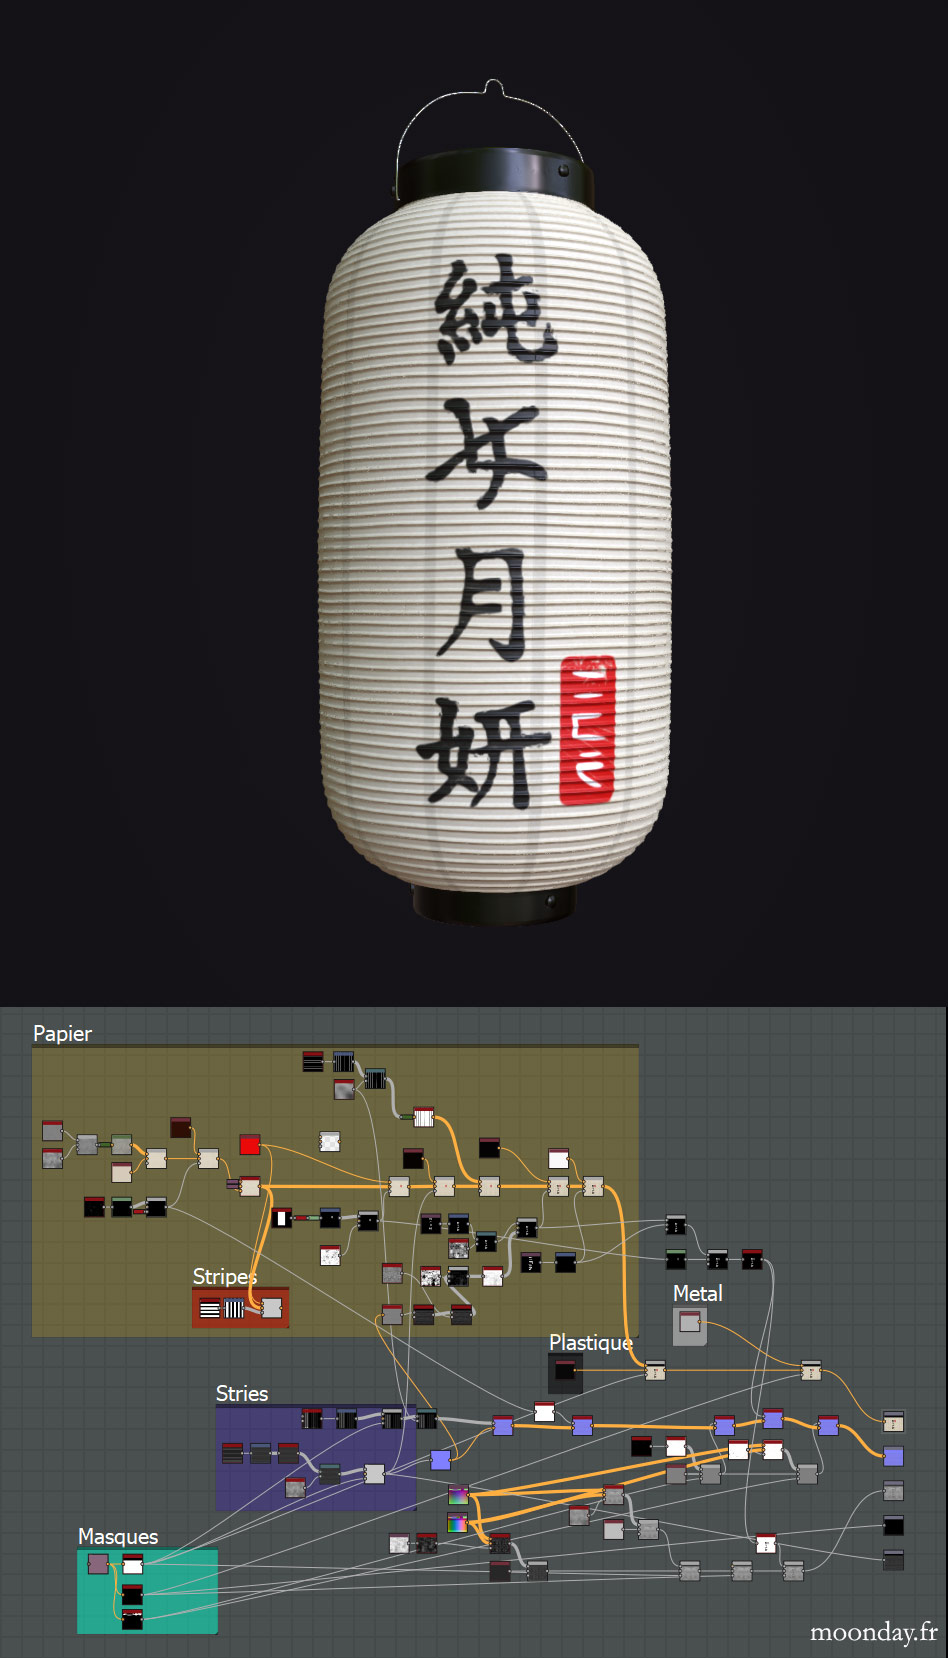
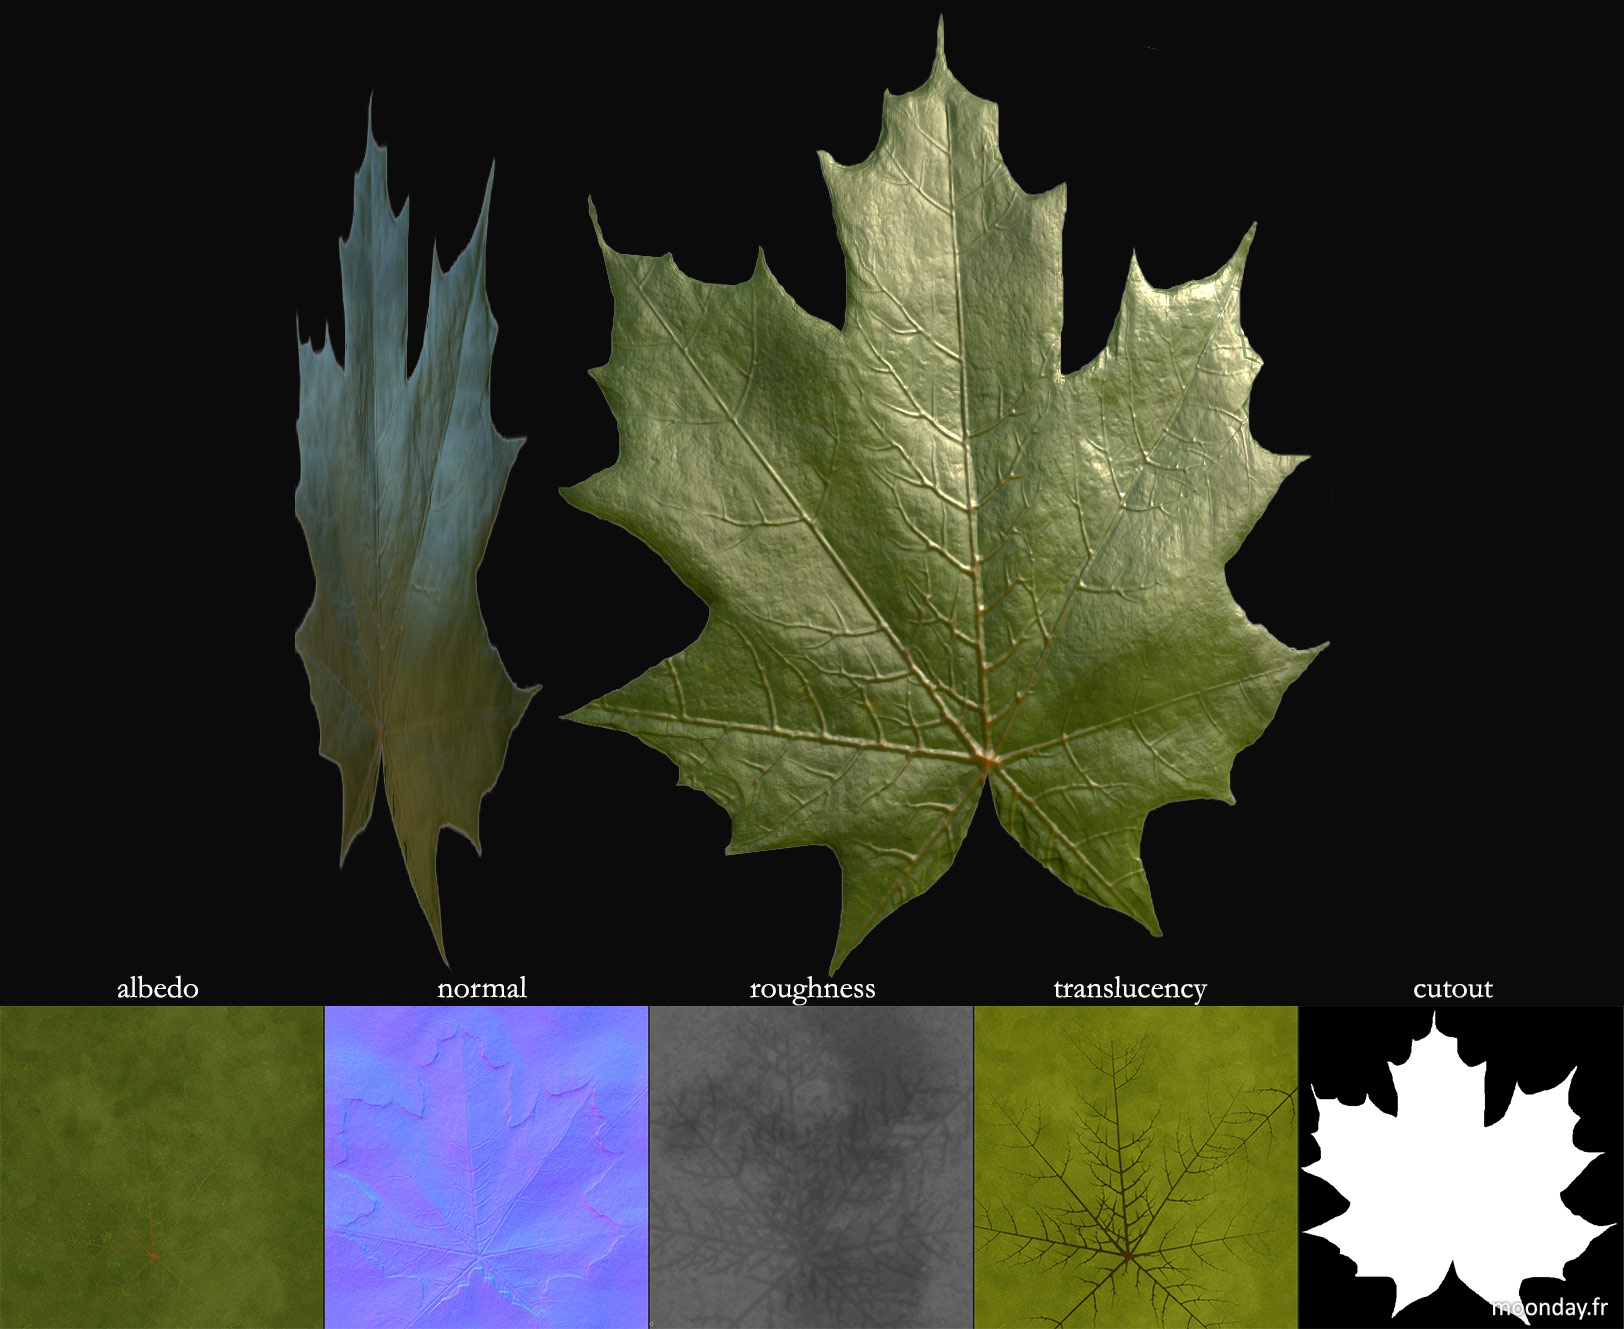
To add a challenge in this project I decided to create almost all the textures and materials procedurally in Substance Painter and Designer, no scanned no photography sources. While Painter did the job to on head textures, Designer took care of the rest: eyes, clothes, building, leaf, trunk, lantern.


Environment
About these last elements, during the project I wondered what environment this character could live in. Initially I thought of a forest place, this is the reason why I started to work on a leaf material in Designer and its shader in Mental Ray. Then after many tests and poses I decided to put the character in a city environment, like if she was on her way to a summer festival.
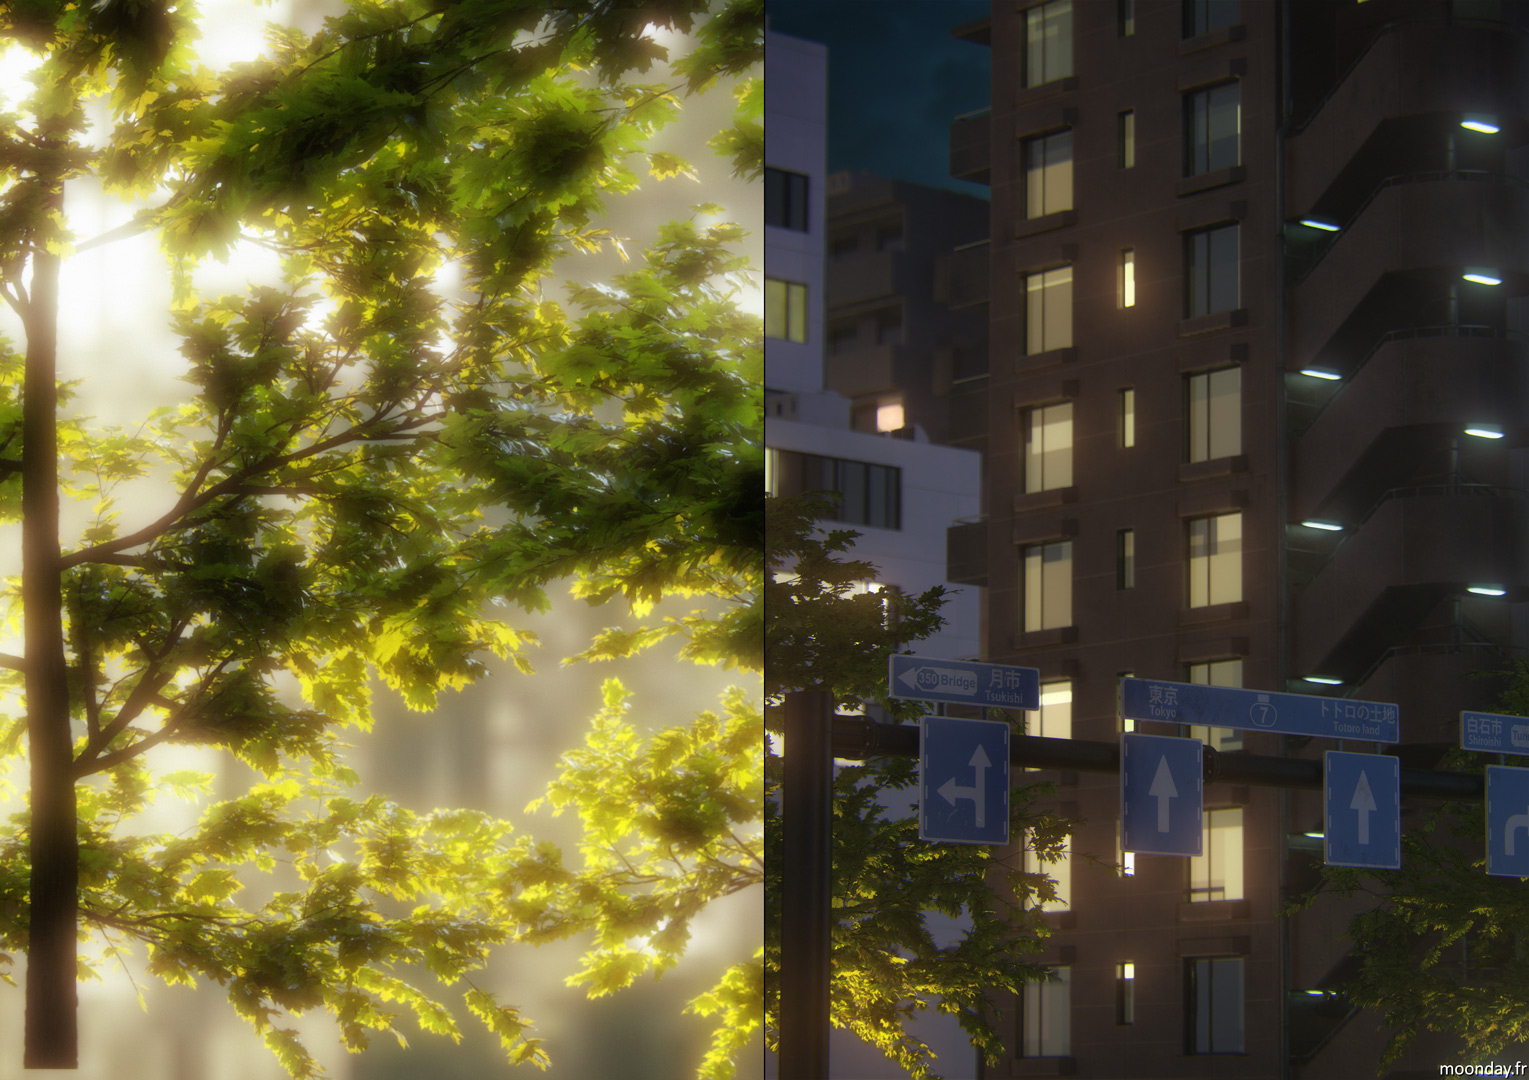
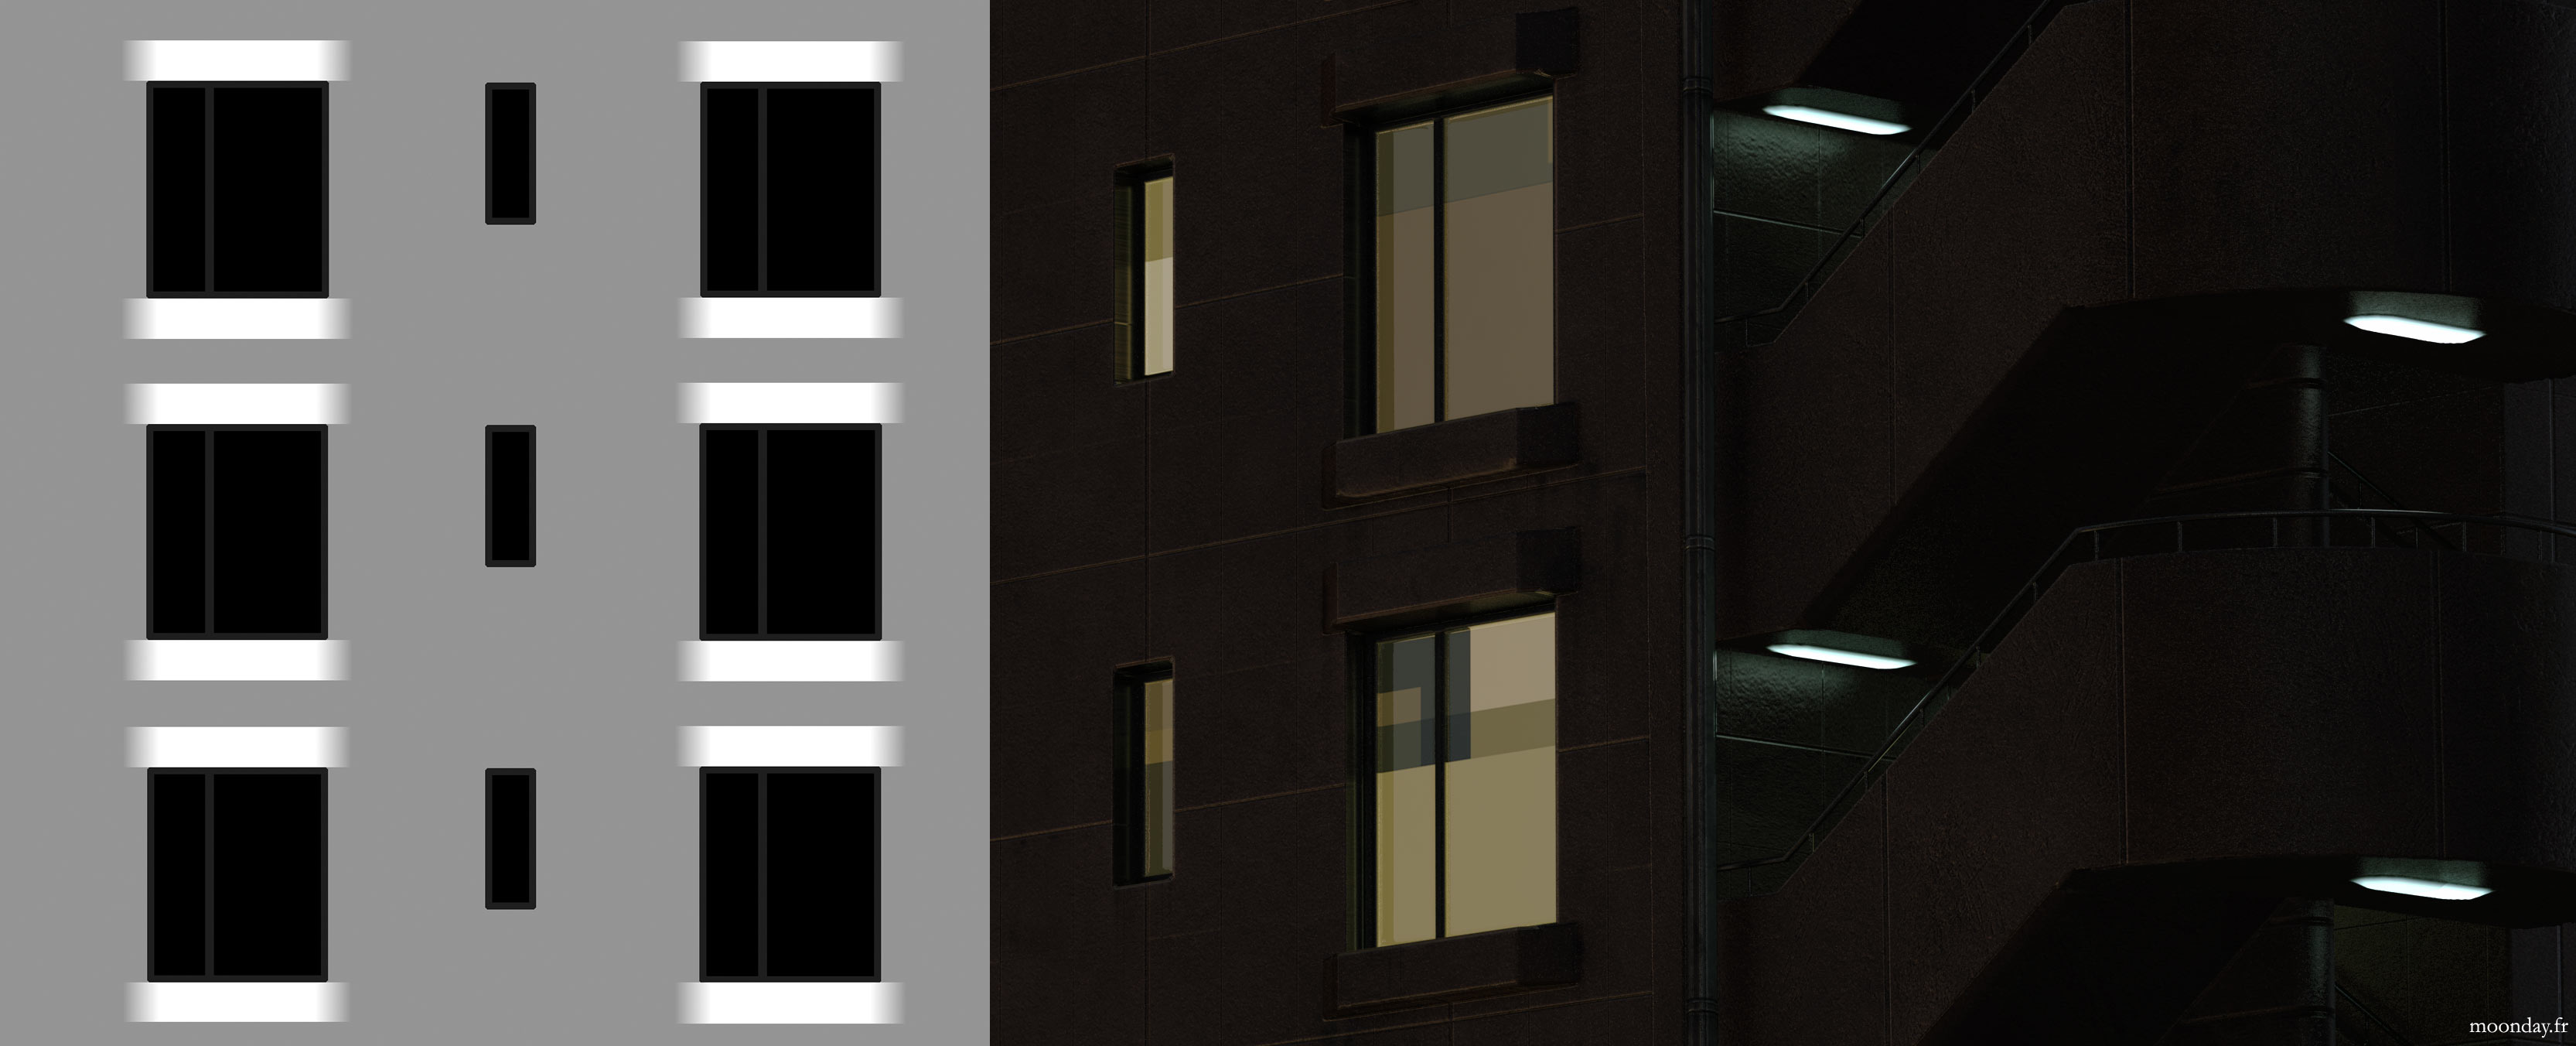
About the central building in the background, windows detail and lights emitting from apartments were the result of displacement and multiple tile generators in Substance Designer.
While working on the forest environment I could dive again in tree creation with the help of GrowFX. Vertex color option is a wonderful tool to add tint variations in the foliage.

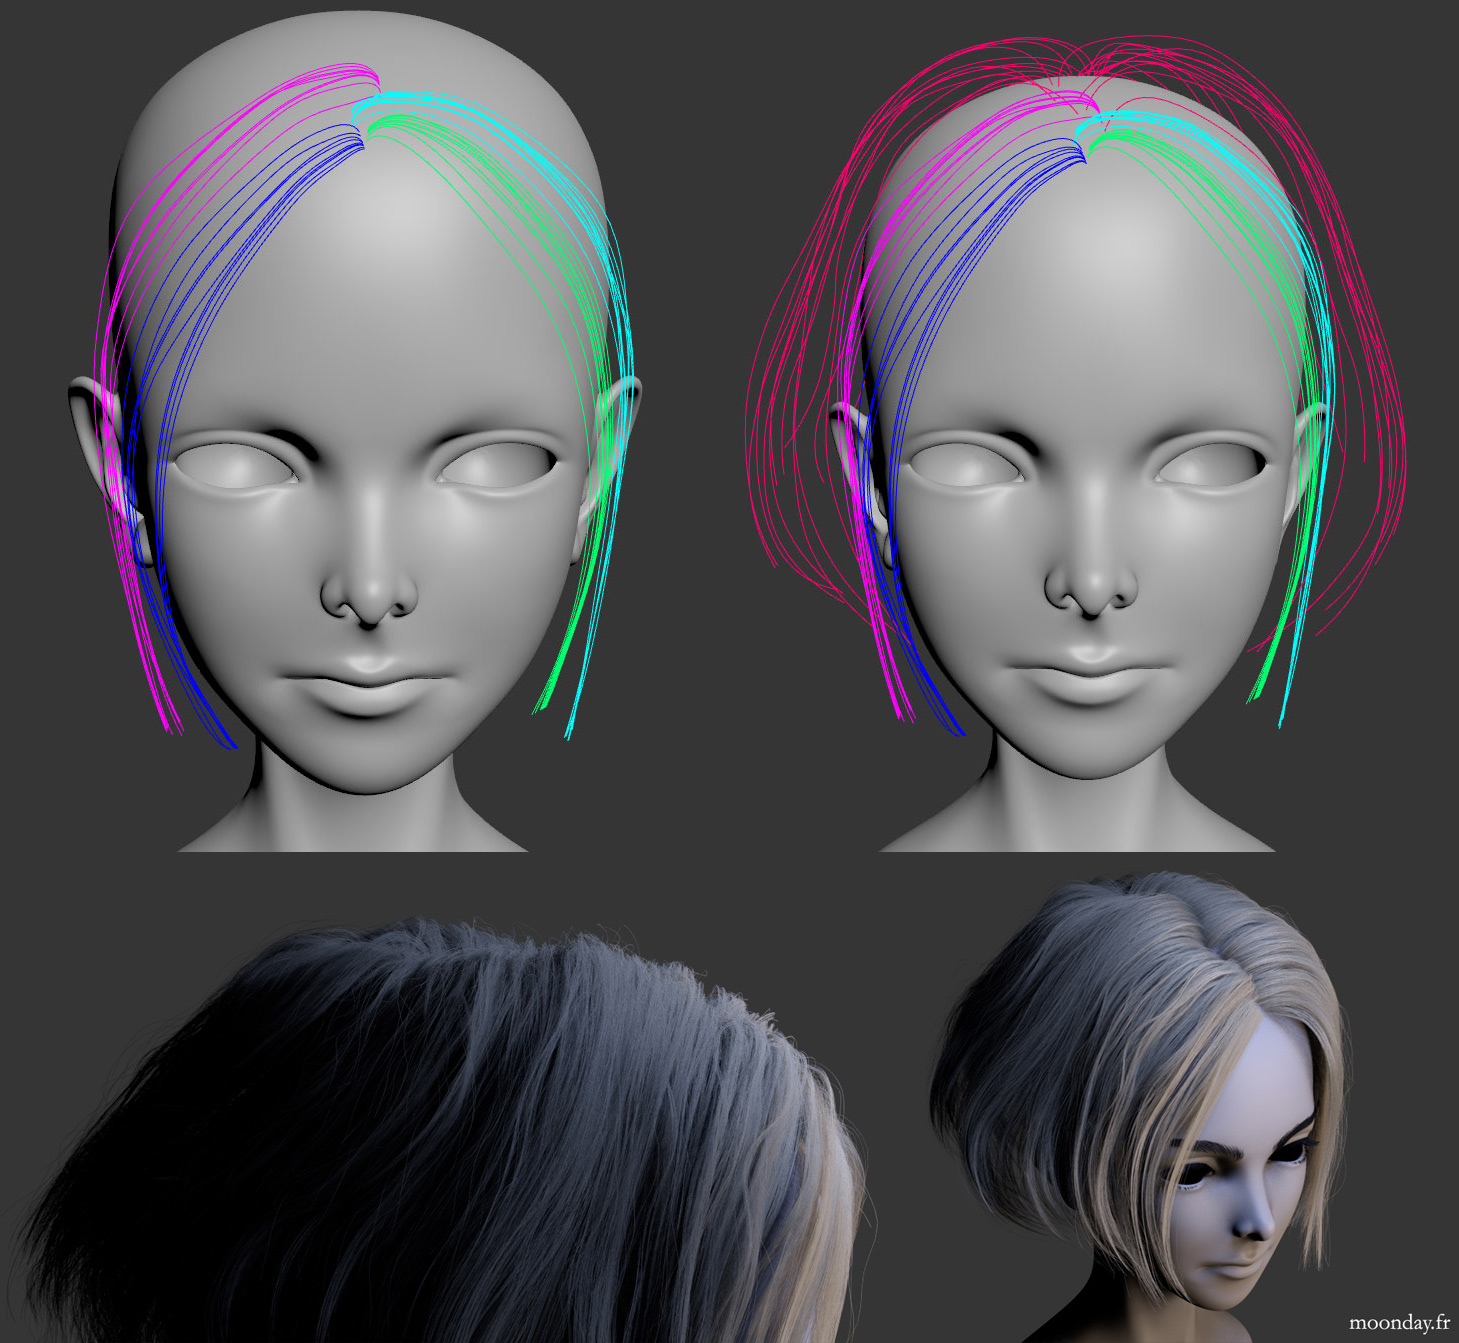
Hair
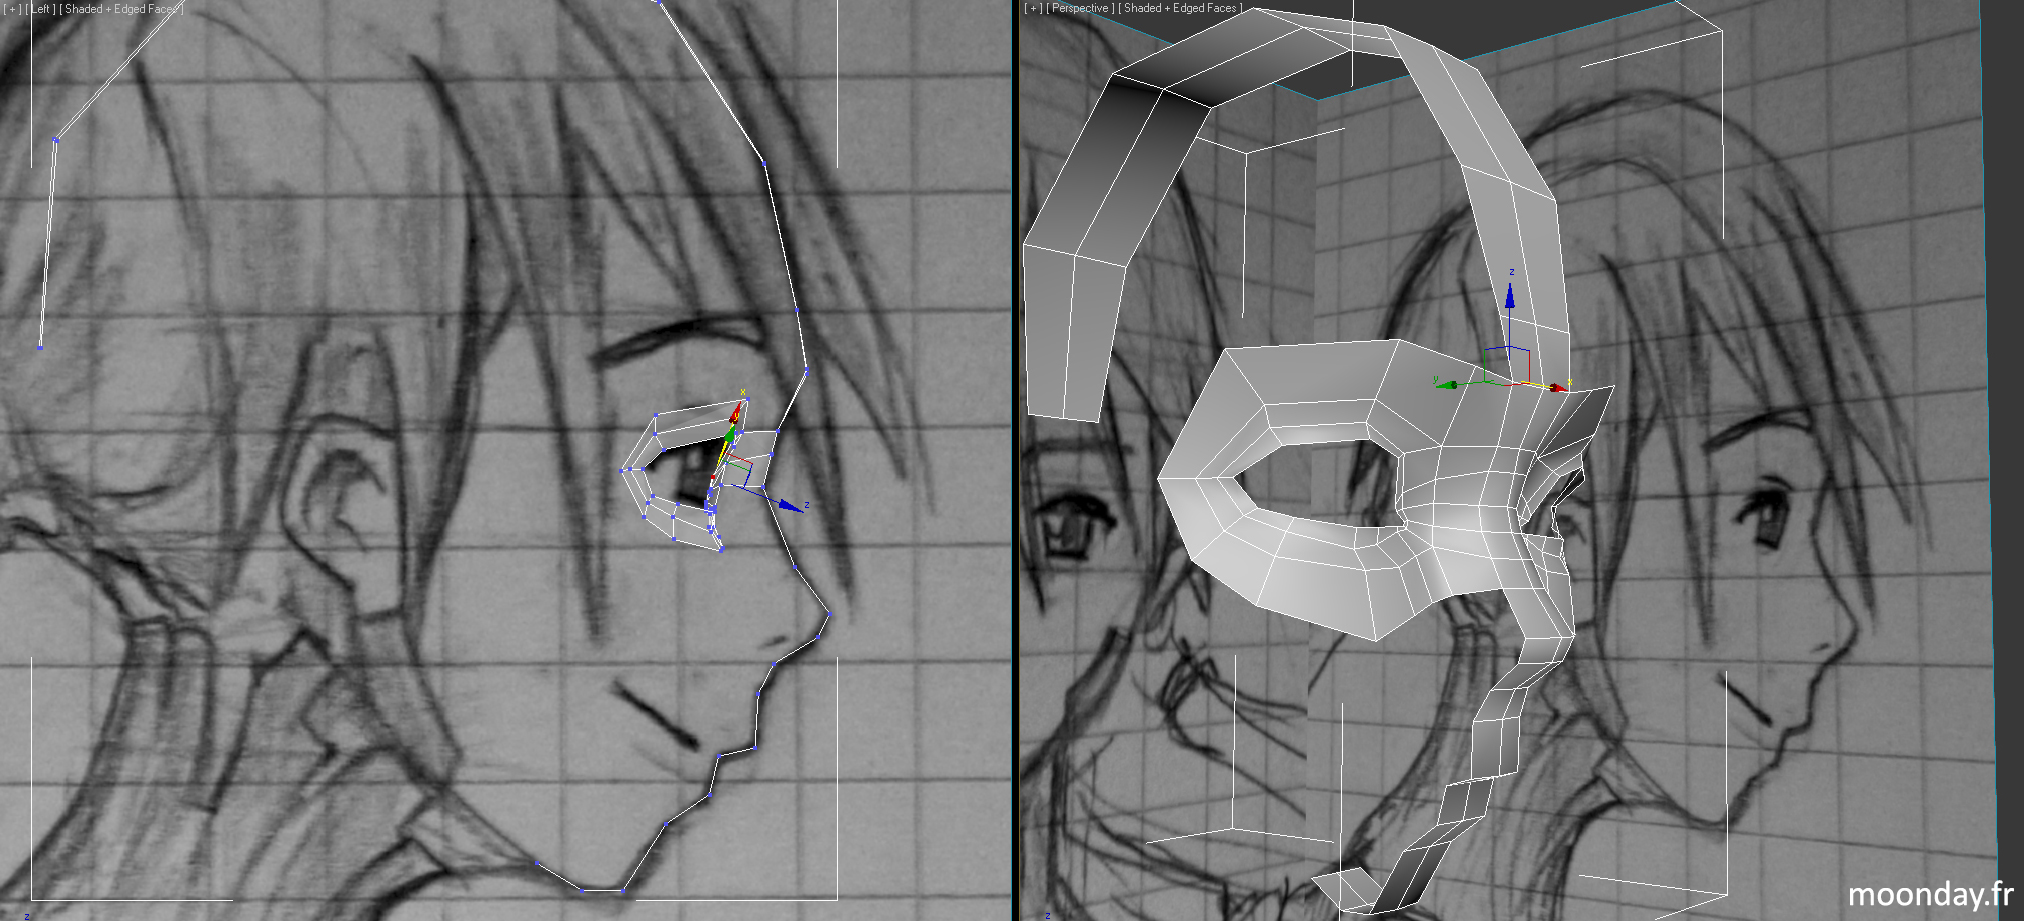
Before going in the hair creation process, at sculpting stage, I first edited some hair style in 2D to see which one would fit the best.

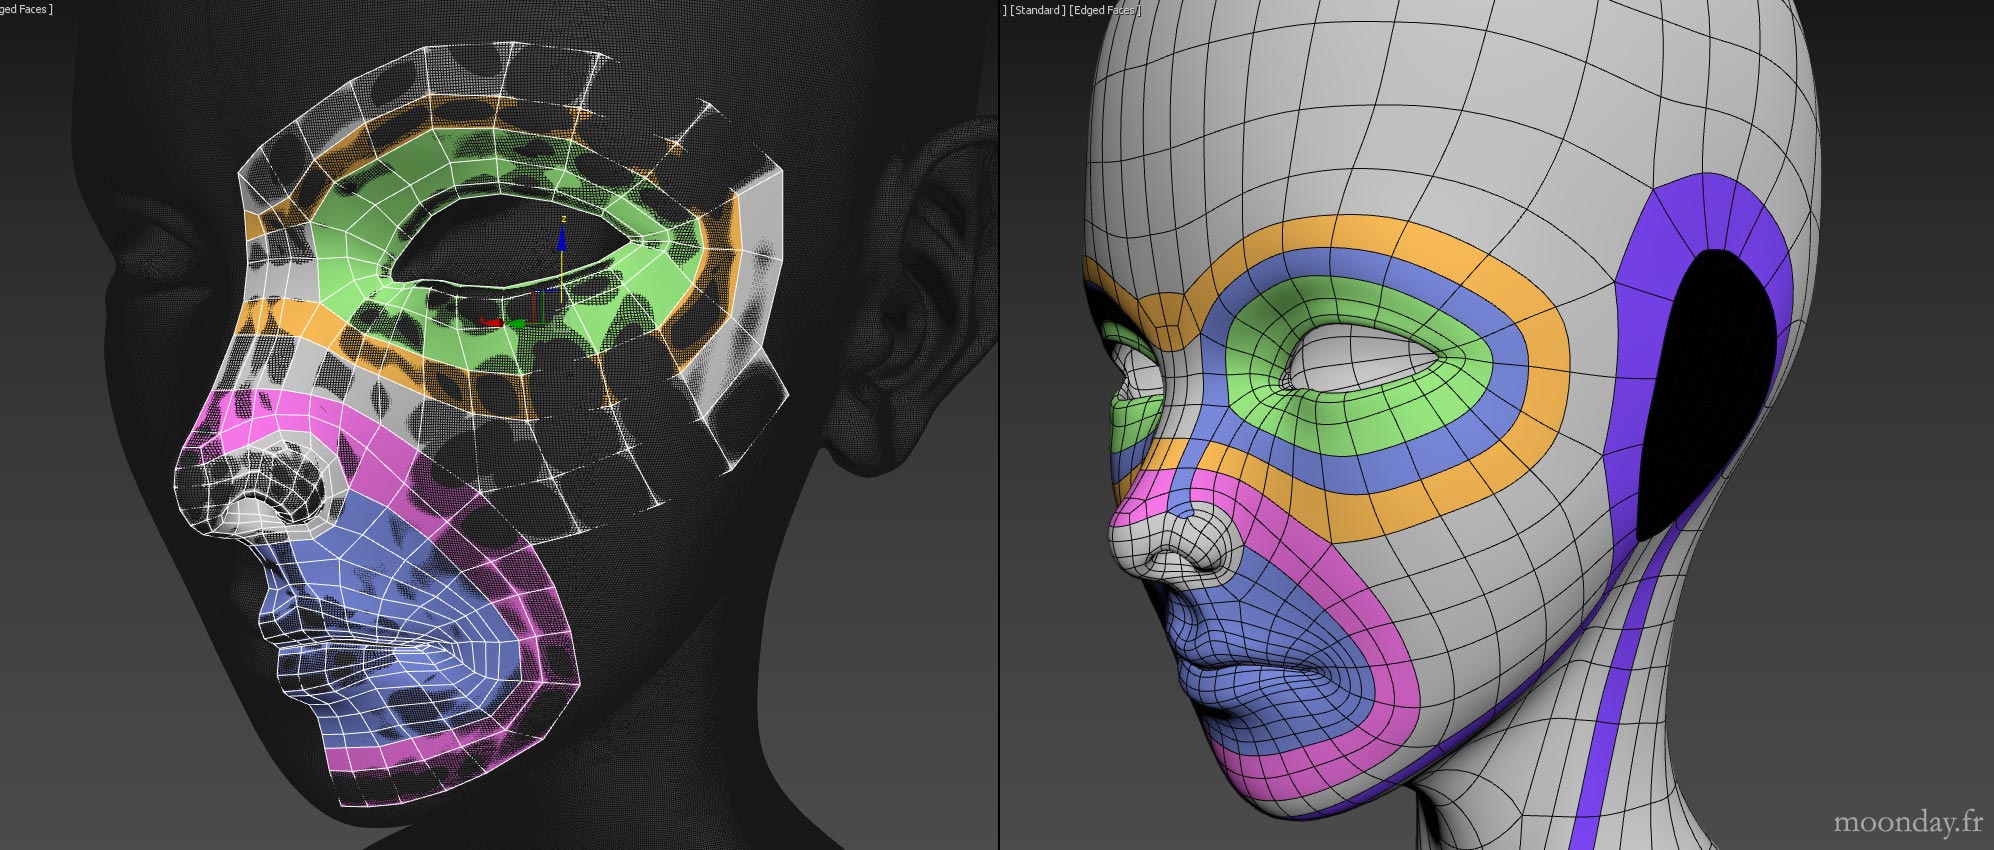
As some elements were pretty heavy to handle for my computer, hairs were created in a separate scene containing only the head elements. I extracted splines from the hair curve tubes created earlier in Zbrush to create a cage for the main hair object, I added an Hair&Fur modifier on it to create more strands and exported the result as splines. Then I added Hair Farm modifiers on this huge spline cage to get the desired look. The same process was used for the front hair (4 different hair locks).
Tests
Getting your materials to look great in Substance Designer and iRay is one thing but getting them to look great in Mental ray is another thing, therefore, before jumping on the scene render process I launched some test using Mental Ray and Marmoset Toolbag.

Mental Ray – Marmoset Toolbag – Substance Designer / iRay
Adjustments
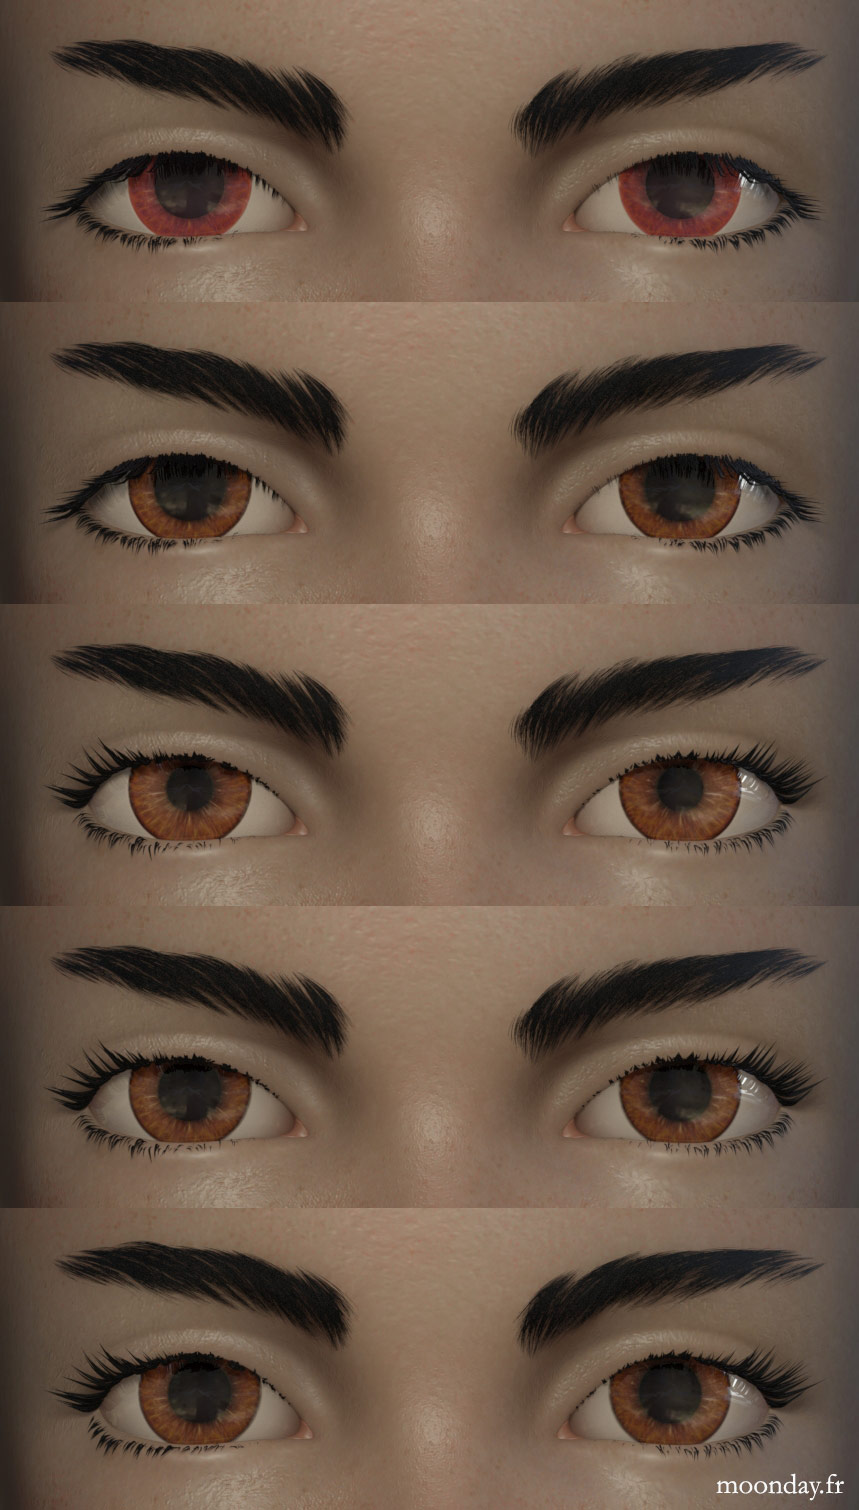
My friend Alex Alvarez gave many good feedback about the character shape and overall scale, this explains why it took some times before I could go in the rendering process, here are some evolution on the face.

Refining the eye shape
Refining hair length
Render
Once all the elements were gathered in a single scene, the lighting setup could start. Based on a skylight (with custom HDRI) + Final Gather for the environment light and a few other light sources using photometric lights.
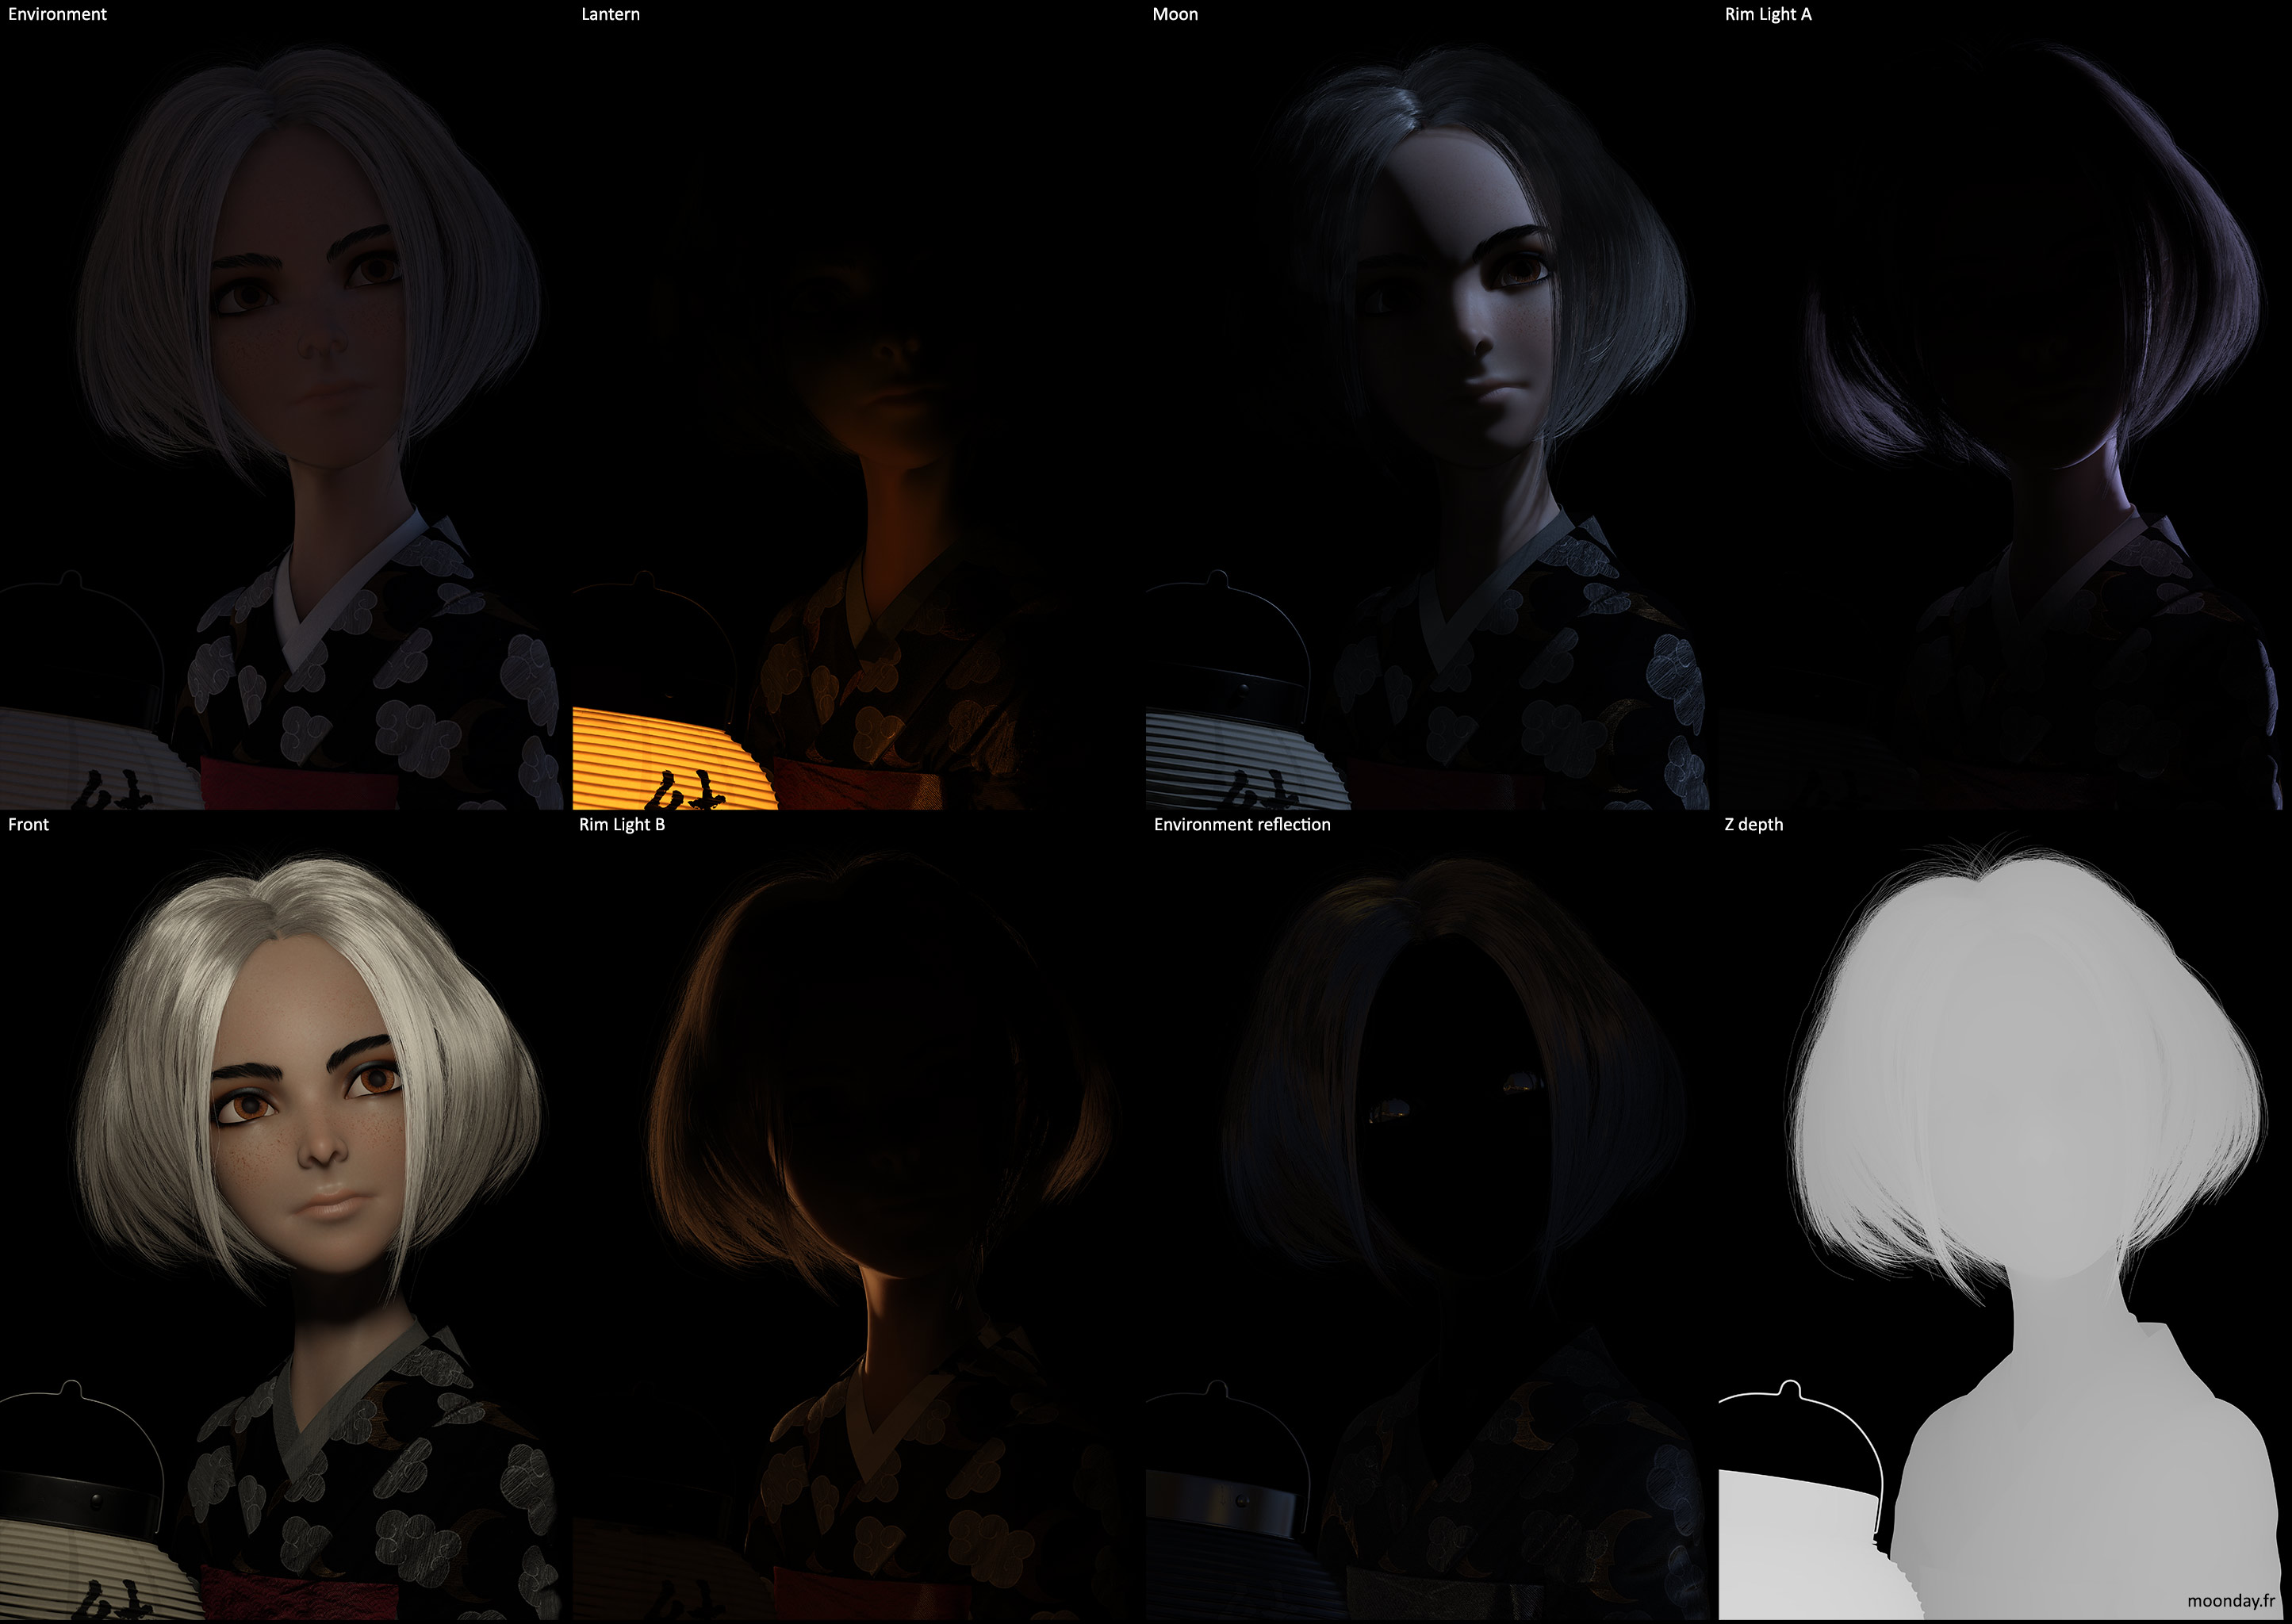
With all the render passes done, I could start the compositing process, changing some lights colour, painting in or out some mistakes.
My friend l’Andalou taught me some good tips about colour correction I could apply to complete this artwork.
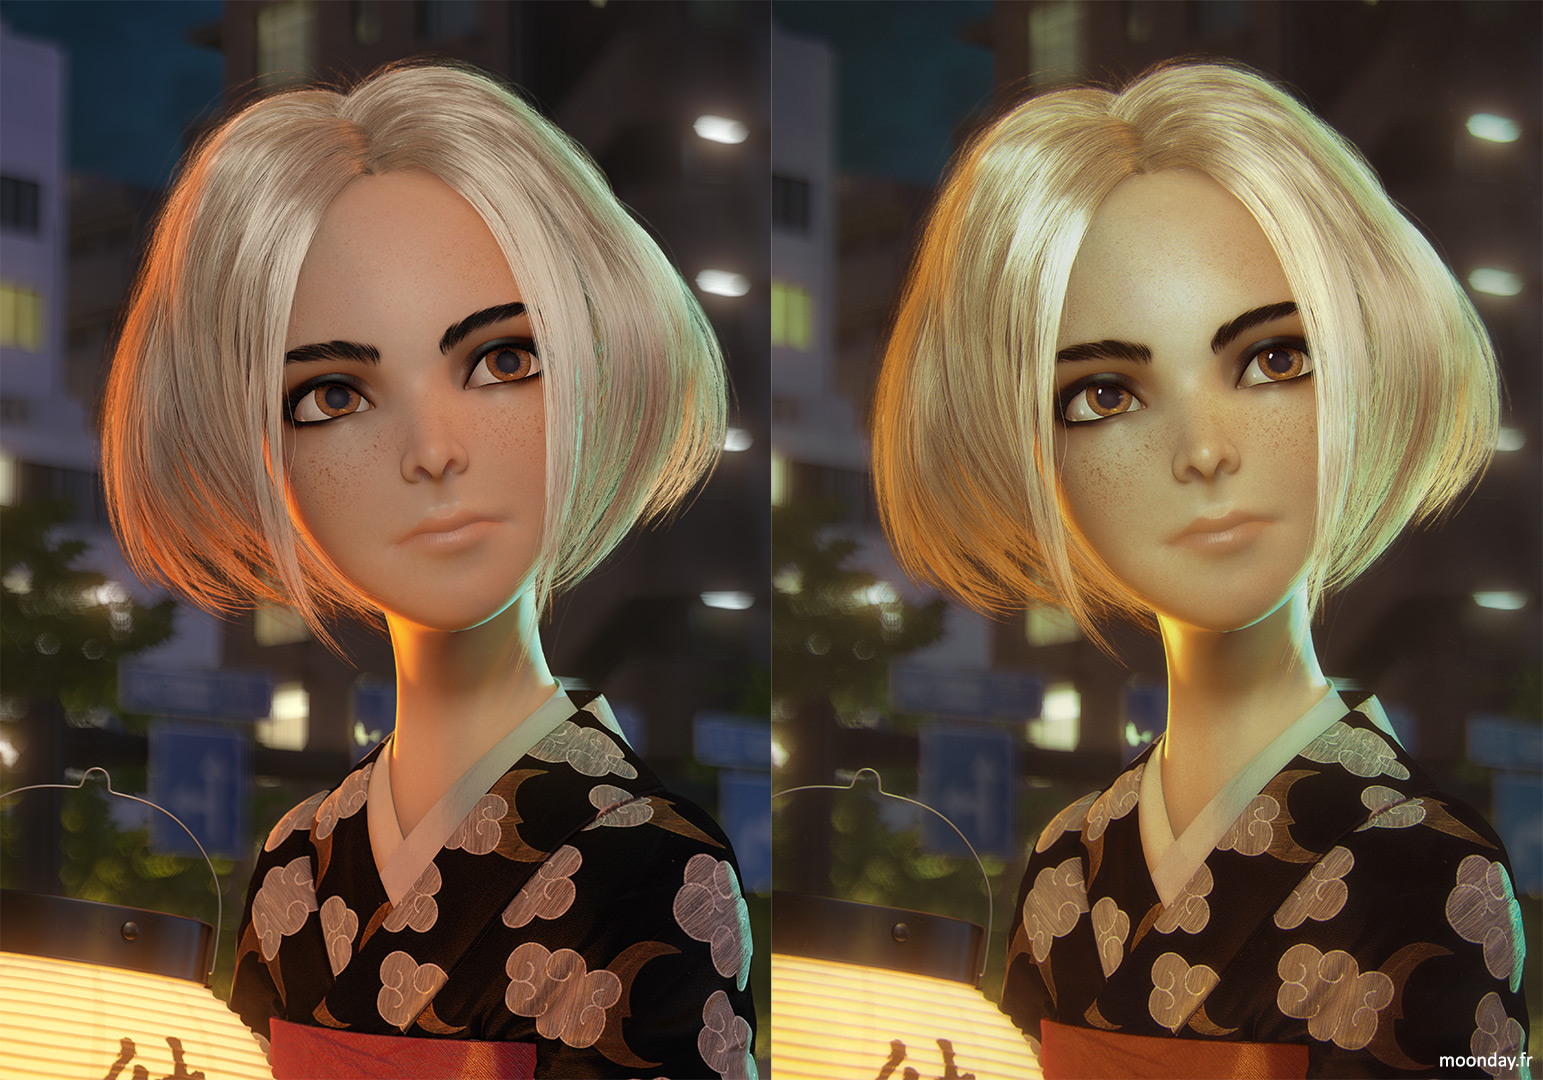
Before / After colour correction
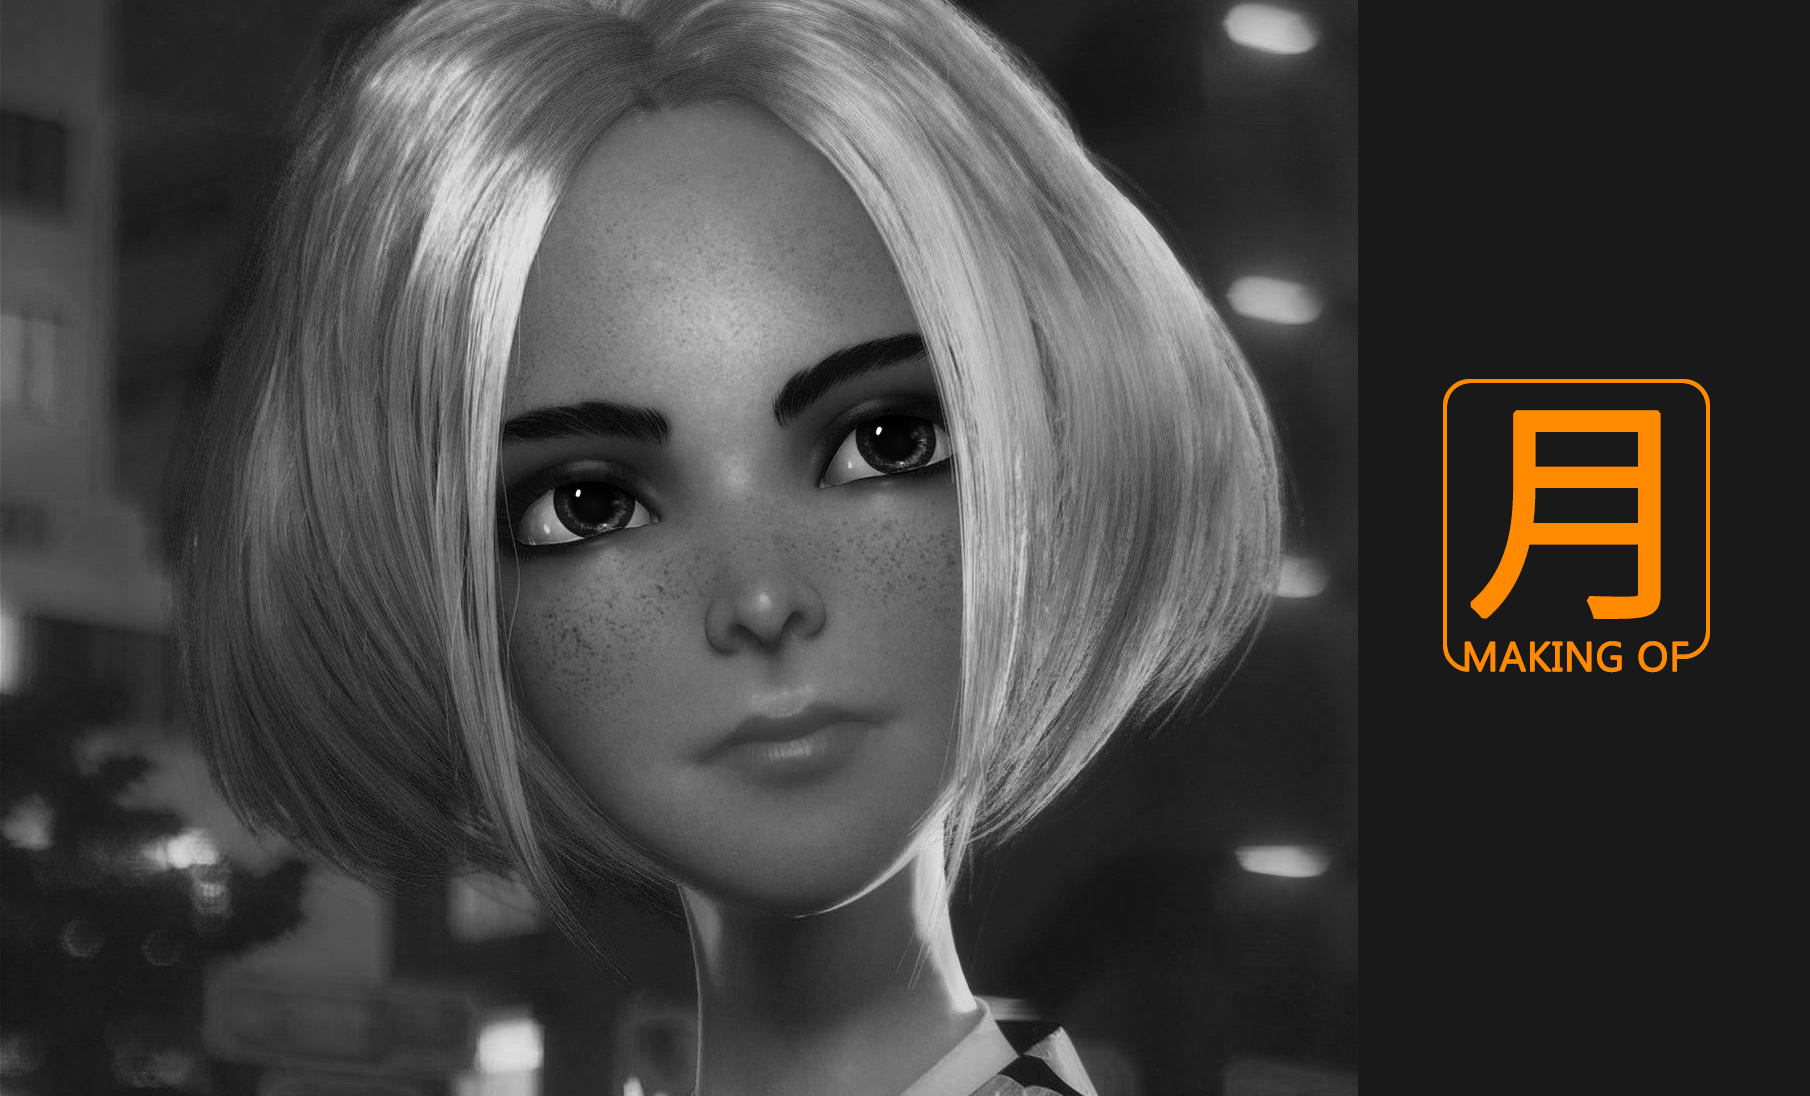
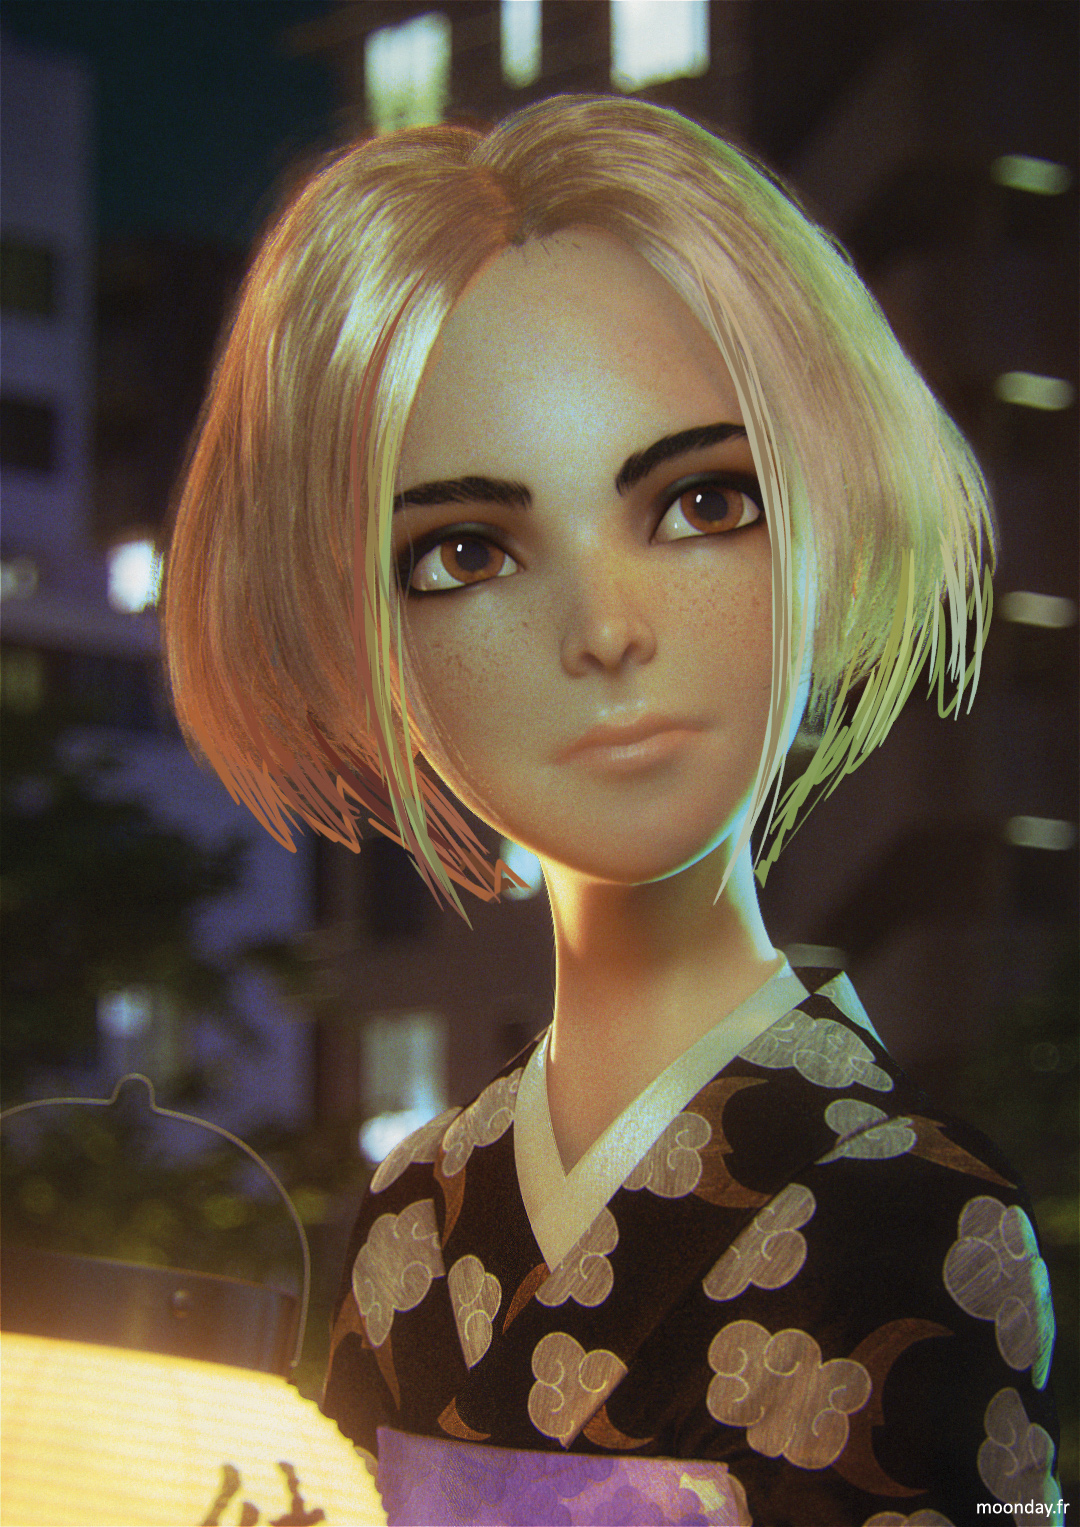
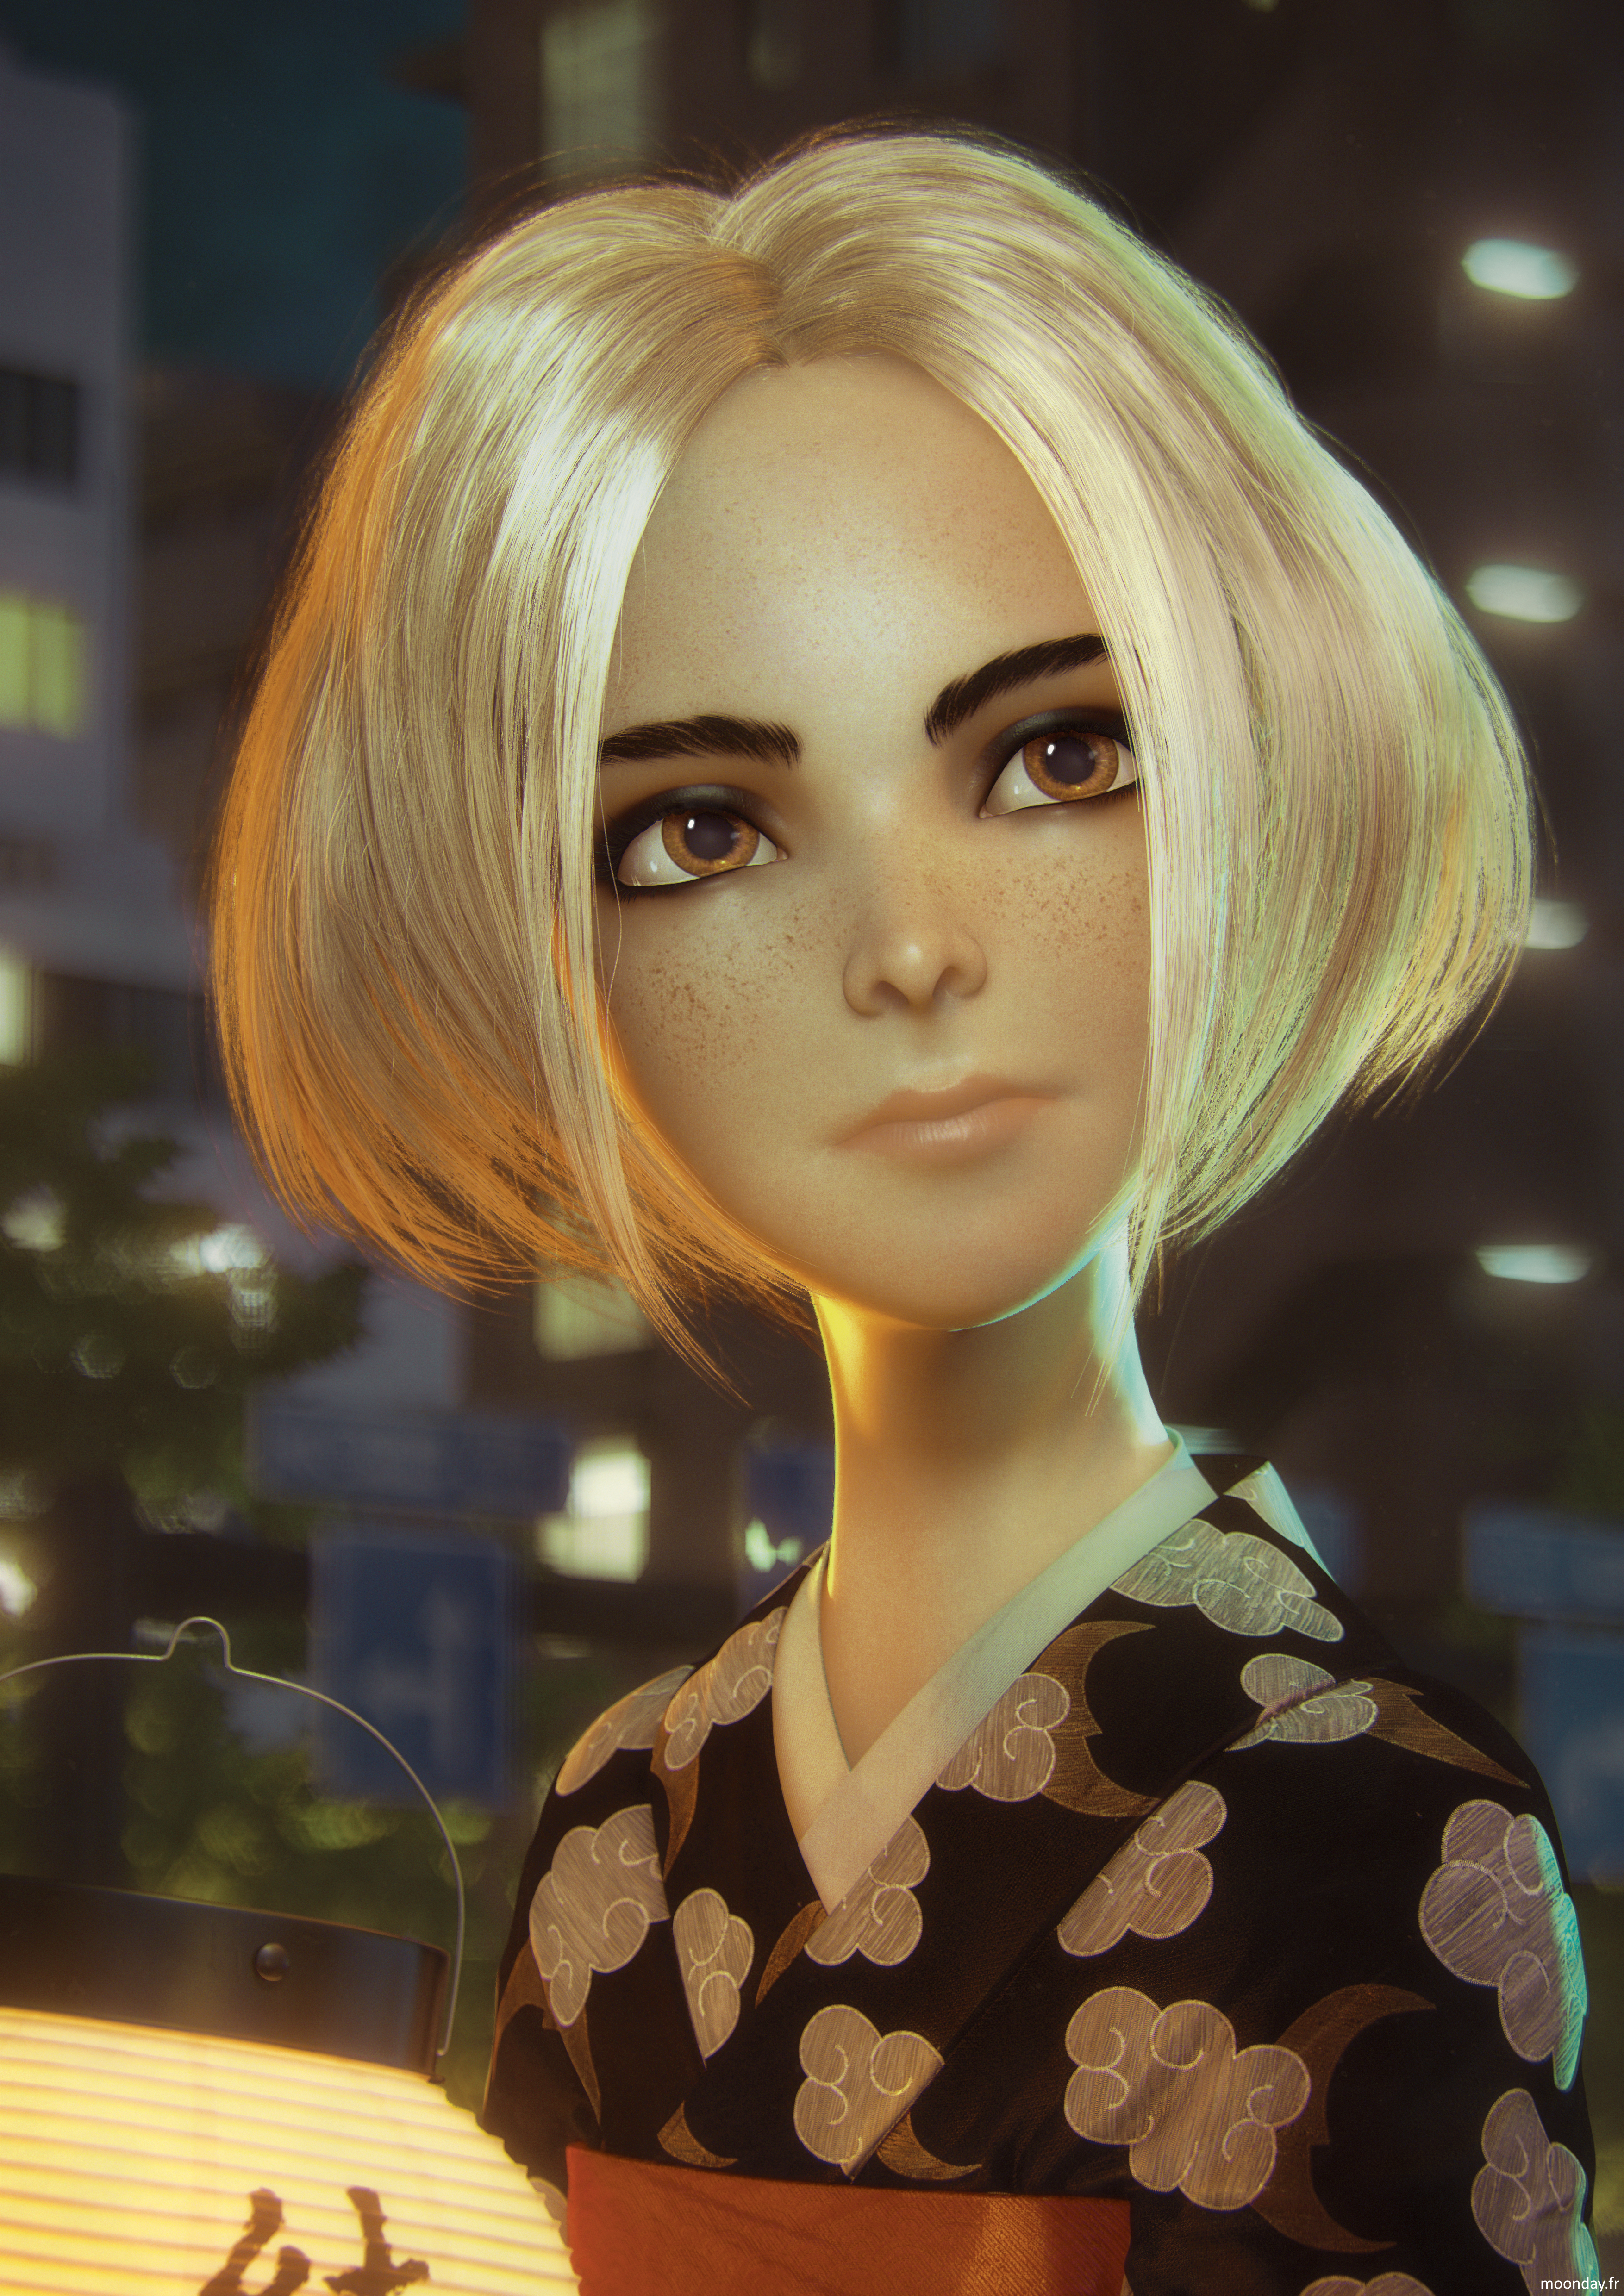
Final artwork, please click on the image to view it at full resolution.
Real time
An alternative version of the scene has been created to freely navigate around the character in Sketchfab. New hair have been generated with the help of FurGuides Painter to cover the head. In the following video you can have a look at how I transferred hair details onto low poly geometries with the help of 3ds Max and Substance Designer. First time I ever did this process, somehow, the real time scene went from 7 millions to ~100k polygons. This workflow needs some polishing for my next projects.